Photoshop Tutorial: 3 Ways to Save Your Images

Learn from Carol Lopes the 3 ways to save a file in Photoshop so that you can edit, print, or share it on social media
Saving an image file in Photoshop may sound simple, but it requires following different steps depending on what you want to do with your image.
In this tutorial, post-production expert and photographer Carol Lopes (@carol_lopes) will teach you three ways to save your images: one so that you can continue to edit later, one so that you can print, and another for sharing on social media.
Watch the tutorial in the video below:
1- Save the image to continue editing it later
a. Always keep your source file in layers.
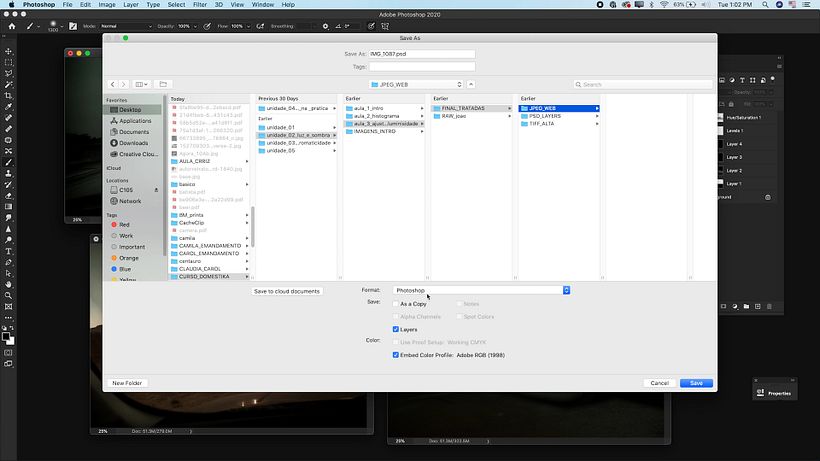
After finishing editing your work, it is important to save the file in layers. This step is essential to ensure that later you can undo a previous edit. To do this, you'll have ideally been using layers in your source file since the beginning.
b. Save.
To save, click on "File" in the top menu. Select "Save As..."
c. Create folders and subfolders.
The best way to organize your files is to create folders and subfolders for each type of image you might need. This way, the process of searching for them will be much easier. When possible, also try to use a standard naming system that feels intuitive, for example: photo_project_date.

2 - Save the image to print
When you need to print a file, it's best to save it so that it retains the highest image quality. To do that, just follow these steps:
a. Collect the layers to ensure that they are all joined together into a single image.
b. Click on "File" in the top menu. Select "Save As" and save the image as a high-quality TIFF file.

3 - Save the image to publish on social media
If you want to share your image online, it's not necessary that it be saved in a high-quality format. Some platforms even have a maximum number of megabytes they'll upload or require that files be compressed. Here's how to save your image in a social media friendly format:
a. Convert the RGB color standard to sRGB, which is the one most widely used on the internet.

b. Decrease the size of the file by making the image smaller. If it previously was 3500x3500, for example, resize it to 2000x2000. That way, you'll get a quality, compact image file that can be uploaded to any social network.

If you liked this tutorial, you can learn more about post-production techniques and how to share your photographs in the course 'Color and Light Treatment with Adobe Photoshop', by Carol Lopes.
You may be interested in:
- Introduction to Adobe Photoshop, by Carles Marsal
- Adobe Photoshop for Photographers, by Oriol Segon
- Adobe Photoshop for Color Correction, by Manu Torres


1 comment
pitujones
PlusGracias!